 SQL Server administration, once installed and running, doesn’t vary too much based on your operating system, but the differences in the operating systems are pretty significant. To properly administer a production SQL Server on Linux, an administrator needs to understand the core basics of the Linux operating system.
I’m going to limit the scope of these discussions to the currently supported (as of CTP 2.1) operating systems for SQL Server on Linux, namely Red Hat / CentOS, SUSE, and Ubuntu. Most of the images in the screenshots will be from Ubuntu, my preferred distribution of choice, but the core concepts are very similar across all distros. If you’re looking for production systems, you should want to pick a distribution where you can purchase production-grade support.
First, installing Linux is pretty straight forward. Â Similar to Windows, an installable image is downloaded, usually in the form of an ISO. Go to their respective web sites, download the ISO image, and follow their installation guides to perform the most minimal installation possible of their distro.
Red Hat Linux installation guide
CentOS Linux installation guide
Ubuntu Linux installation guide
Just do a basic installation with nothing else but an SSH server installed. One of the primary benefits of Linux is that the installable footprint is tiny, keeping the security and maintenance as small as possible. I personally don’t even want a GUI installed, as I’d just use it as a front end for a terminal anyways.
Once installed, now what?
Use SSH to get access into the console of this new server. Log in with your login and password that you created when you installed the operating system. To make things even more secure, you can use certificates to streamline your login process.
Now, let’s explore some of the commands that we need to use to get around the operating system. This is just a short list of the main commands you need to know when navigating the console of a Linux system.

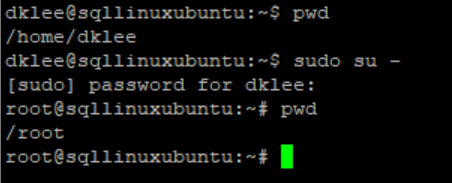
The primary ones are ‘cd’ to change directory, ‘ls’ to list folder contents, mkdir and rmdir to make and remove folders, ‘rm’ and ‘mv’ to remove or move a file. ‘pwd’ tells you your present working directory.
You’ll want to learn the syntax for one of the console-based text editors. My personal favorite is ‘vi‘. It’s quick, streamlined, but does have a significant learning curve. Emacs is another editor that works great. Many others are out there, and your options open even more if you’re using a GUI. You’ll need an editor to edit configuration files.
The folder structure of Linux is one of the biggest changes. Whereas Windows is based off of an arbitrary drive-letter assignment system that dates back to the DOS era, Linux is is based off of a tree structure. All folders and files are based on a single point, ‘/’ or the root folder, and everything is based off of folders from this point. Certain folders from Windows, such as C:\Windows, C:\Users\username, or %WINDOWSTEMP%, are mapped to certain folders within the Linux operating system.

Your home directory is at /home/yourusername. SQL Server for Linux installs at /var/opt/mssql, at as of CTP 2.1 cannot be changed.
But… as you start to poke around the operating system, you’ll start to notice that some folders state ‘access denied’. Everything that you normally execute runs in a minimal least-privilege level of access.
Elevated Access
The biggest concept of Linux is the concept of ‘root‘.
We’ve all seen this in Windows:

This prompt is so that you are running your normal commands without elevated privileges, so that any significant system change cannot be made without an additional layer of authorization. The ‘root’ user in Linux is essentially a full-access account, similar to ‘sa’ in SQL Server.
Issuing a command that requires elevated privileges usually ends with an error like this.

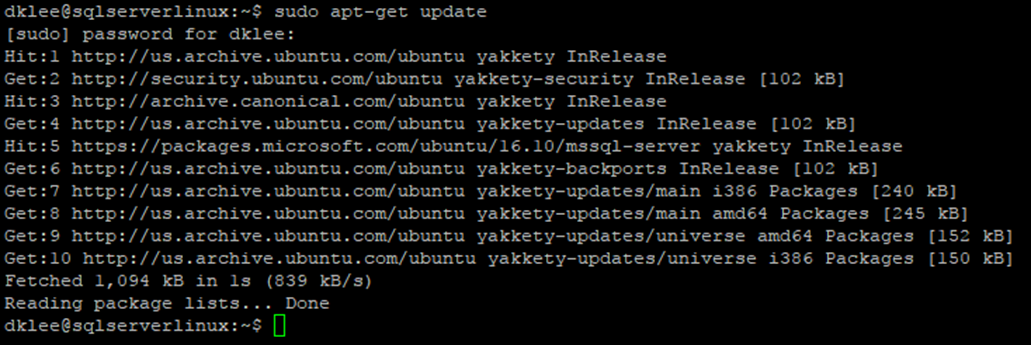
You start with the ability to issue a single command with ‘sudo command’, or super-user do this. You can execute one of these elevated commands as follows to execute this single command with elevated privileges.
Use sudo sparingly, just as you would with Windows and good security principals. If you need to run a series of commands as the elevated user, issue ‘sudo su –‘ to switch to the root user for the session. Type exit to exit this level of elevation and switch back to your normal user account.
You’ll want to explore the system logs at /var/log, as these are a significant source of information about how your operating system is running.

Use ‘cat file’ to view these files to the console, and ‘tail -f file’ to see the changes to these files as they occur.
Things you’ll want to do before you continue to installing SQL Server:
- Patch and get the operating system up to date
- Set a static IP address
- Verify and set your hostname
- Specify your DNS servers and DNS entry
- Verify your security to ensure that the operating system is locked down. Your respective operating system distribution is sure to have hardening documentation for you to follow.
One tip – want to visually manage the system remotely and quickly? Install Webmin! Follow the directions specific to your operating system. Browse to your server with a web browser at https://servername:10000/ and log in with your credentials.


Poke around, install, configure, and explore your new operating system’s basics! (Admittedly, it’s not too exciting at the moment. You’ve got a console. Woohoo!)
Next stop – installing SQL Server on Linux!
Trackbacks/Pingbacks